Introduction
You know you need to sell online. You have known for a while.
But every time you start, something stops you. The platform choices look endless. Pricing pages hide the real cost. And somewhere in the back of your mind, you’re wondering what UK law expects from an online shop.
Sound familiar?
Most people searching for how to create an eCommerce website are stuck on the same four questions:
- Which platform suits my budget and skills?
- What will it cost in pounds, all in?
- What needs to be ready before my first order?
- Can I build it myself, or do I need a developer?
These are fair questions, and the answers matter. The wrong platform means a rebuild later. A clumsy checkout sends buyers elsewhere. Missing legal pages leave you exposed.
Meanwhile, shoppers keep moving online. ONS data shows that 28.3% of retail sales in Great Britain were made online in July 2026.
This guide will walk you through creating an eCommerce website in clear steps. You will see what each stage involves, what it costs and where AI tools can save you hours. By the end, you’ll know exactly what to do first.
What is an eCommerce Website?
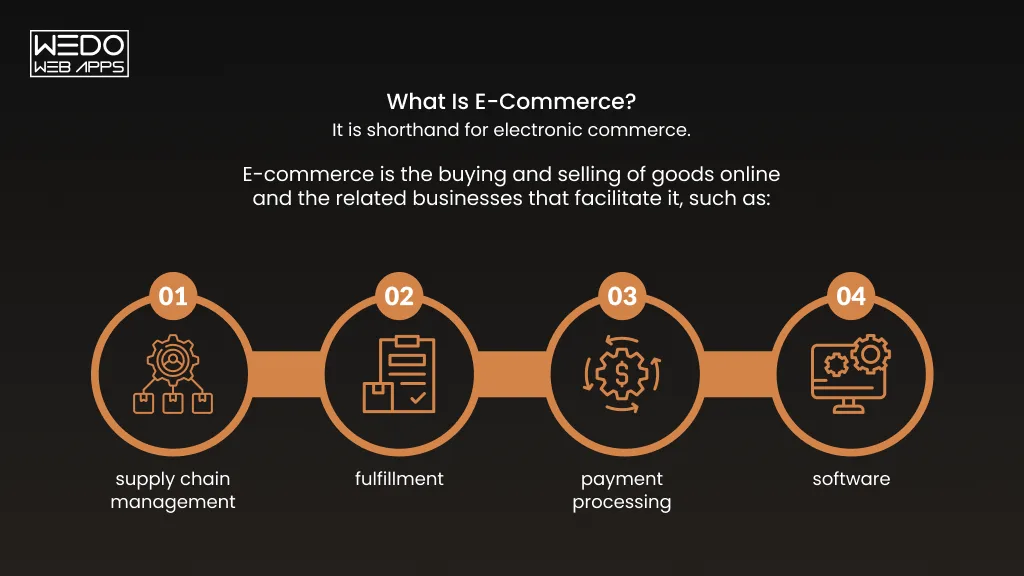
An eCommerce website lets customers find a product, add it to a basket, pay and get an order confirmation without contacting you. It takes orders at 2 am on a Sunday as easily as at 2 pm on a Tuesday.
If your site lists products and asks people to ring or email to buy, it’s a brochure site. It becomes an eCommerce site the moment a customer can pay on it.
eCommerce Website vs Standard Business Website
The two can look alike on the surface. The difference is in what happens behind the scenes.
| Standard Business Website | eCommerce Website | |
|---|---|---|
| Main job | Share information and collect enquiries | Take orders and payments |
| Products | Optional gallery | Searchable catalogue with live stock and prices |
| Checkout | None | Basket, payment, order confirmation |
| Behind the scenes | Page editor | Orders, inventory, shipping, tax, and refunds |
| UK legal duties | Privacy policy and cookie consent | The same, plus delivery terms, returns rights and VAT |
| Example | A plumber’s contact page | A candle brand selling 40 scents |
Try a quick test on your own site. Can a stranger find a product, pay for it and receive a confirmation email without speaking to anyone? If the answer is no, you have a gap to close, and the rest of this shows you how.
Own Store, Marketplace or Social Selling
You can sell online without building a store at all. Whether you should depends on what you want to own.
- Your own eCommerce website
You keep the customer data, the branding and the margin. Example: a skincare brand can email buyers when their moisturiser is about to run out. The catch is that you have to bring your own traffic.
- Marketplaces such as Amazon, eBay and Etsy
Shoppers are already there. So are your competitors. Example: a handmade jewellery seller on Etsy sits beside hundreds of similar listings, so price often decides the sale.
- Social selling on Instagram or TikTok Shop
Strong for discovery. Weaker for repeat orders, because the platform controls the relationship with the buyer.
Many UK sellers combine all three. They use marketplaces and social media to get found, then guide repeat buyers to their own store, where the long-term value builds.
eCommerce Website Development Process: Step by Step
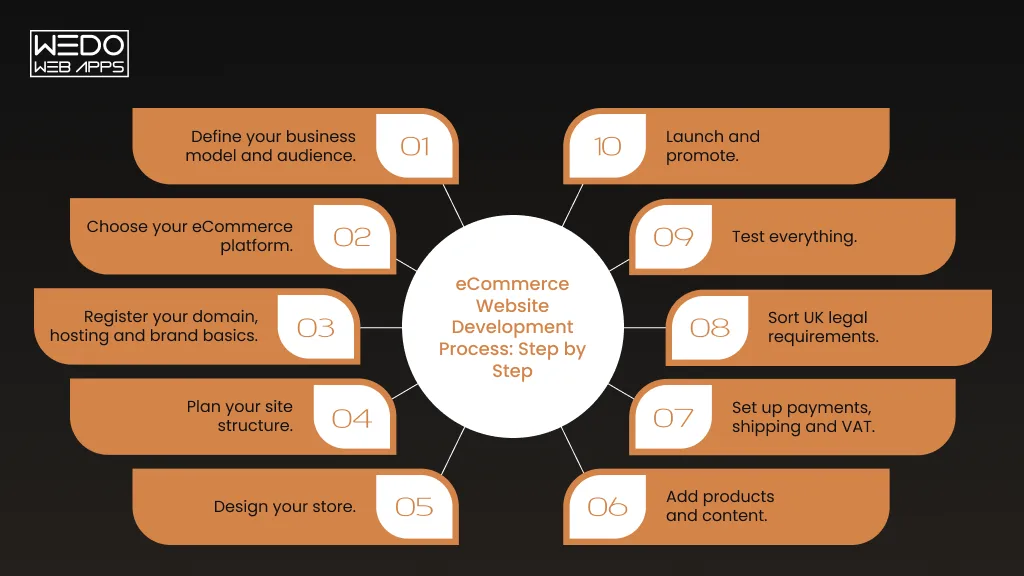
The eCommerce website development process has 10 stages of development. Skip one and you will meet it again later, usually at a bad moment.
Use this list to build an eCommerce website step by step without guessing what comes next. A simple store on a hosted platform can go live within a few weeks if your products and visuals are ready. A build usually takes months.
- Define your business model and audience.
- Choose your eCommerce platform.
- Register your domain, hosting and brand basics.
- Plan your site structure.
- Design your store.
- Add products and content.
- Set up payments, shipping and VAT.
- Sort UK legal requirements.
- Test everything.
- Launch and promote.
Step 1: Define Your Business Model and Audience
Before you open a single platform tab, decide who buys from you and how the order reaches them. This choice shapes your checkout and the eCommerce website features you’ll need, from trade login accounts to subscription billing.
| Model | How it works | Example |
|---|---|---|
| B2C | You sell to customers | A pet treat brand selling to pet owners |
| B2B | You sell to other businesses, often with account pricing | A packaging supplier with trade customers who reorder monthly |
| D2C | You make or brand the product and sell it directly | A skincare maker who ships from their own stockroom |
| Dropshipping | A supplier packs and posts each order | A homeware shop that never holds stock |
| Subscription | Customers receive products on a schedule | A coffee roaster sending beans every fortnight |
Then answer three quick questions. Will you ship only within the UK, or abroad too? What’s your typical order value? Do customers need trade pricing or login accounts?
Your answers decide which platform makes sense in the next step.
Step 2: Choose the Right eCommerce Platform
Your platform controls what you pay each month, how far you can customise and how hard it is to leave later. You have three routes.
- Hosted platforms (Shopify, Wix, Squarespace, BigCommerce) : Hosting, security and checkout come built in. Shopify Basic starts at about £19 a month billed annually, or £25 month-to-month, plus VAT. Entry eCommerce plans on Wix and Squarespace sit at roughly £17 to £29 a month. Best for first-time sellers.
- WooCommerce : The plugin is free and runs on WordPress. You pay separately for hosting, a domain, a theme and extensions, and you handle updates yourself. Best if you already run a WordPress site.
- Custom or headless build : App developers build the store around your exact needs. It costs more and takes longer. Best for large catalogues or complex pricing.
Treat these prices as the base of your budget. The full eCommerce website cost UK breakdown comes later, including apps, themes and payment fees.
Wondering how to create an eCommerce website without coding? Hosted platforms are the shortest route. Here’s how to pick one:
- Never built a website before? Start with Wix or Squarespace.
- Planning to grow fast or add apps? Shopify gives you the widest app range.
- Already on WordPress with strong content? WooCommerce keeps everything in one place.
Whichever you choose, make sure you can expect your products and customer data in a standard format. That keep leaving possible later.
Step 3: Register Your Domain, Hosting and Brand Basics
These are small jobs that cause big delays when you leave them to the end of creating an eCommerce website. Work through this checklist:
- Domain name : Keep it short and easy to say aloud. Choose between .co.uk and .com and check the matching Instagram and TikTok handles before you commit. Introductory prices can be a few pounds a year, though renewals usually cost more.
- Hosting : Hosted platforms include it. With WooCommerce you buy it separately, from a few pounds a month for basic plans to hundreds for managed hosting.
- SSL certificate : This puts the padlock in the browser bar. Most platforms include it. But confirm it’s active before launch.
- Business email : Use a proper and verified email rather than a free webmail address. Customers trust it more.
- Brand kit : One logo, two fonts, a small colour palette and a tone of voice. You will use these in step 5 and in the eCommerce website design basic section below.
Check the domain and social handles before you print a single label or order packaging. Remaining later costs far more than checking now.
Step 4: Plan Your Site Structure
Sketch the structure before you pick a single colour. A clear map helps shoppers find products fast, and it gives search engines a logical layout to crawl.
Here’s a starting structure for a typical store:
Homepage ├── Shop (category pages) │ ├── Subcategory │ └── Product pages ├── Basket ├── Checkout ├── Account (login, orders, saved details) ├── About us ├── Contact ├── Delivery and returns ├── FAQs └── Legal pages (privacy, cookies, terms) |
Aim to keep every product within three clicks of the homepage. If a shopper has to dig for it, many won’t.
Then turn the map into rough wireframes. Pen and paper works. So does a free tool like Figma. Mark where the search bar, basket icon and main call to action sit on the homepage and on the product page.
Do this now and step 5 gets much faster.
Step 5: Design and Customise Your Store
Most platforms give you a ready-made theme. You don’t need to design from scratch to build an eCommerce website step by step. You need to make a theme look like your brand.
Customise in this order:
- Logo and colours : Apply your brand kit.
- Fonts : Stick to two. One for headings, one for body text.
- Homepage layout : Lead with your best seller or strongest offer, then show categories.
- Navigation : Match the site map.
- Mobile preview : Check every page on a phone before you touch the desktop view.
Be careful with extras. Every app or plugin you add can slow the site down. Install only what you’ll use in the first month.
Layout, checkout flow and mobile layout deserve their own detail, so we cover them in the eCommerce website design basics section below.
Step 6: Add Products, Content and Categories
Your product pages do the selling. A thin listing loses the sale even when the price is right.
What each product page needs
- Photos : One clean image on a plain background, plus lifestyle shots and a scale reference.
- Title : Clear and specific.
- Description : What it is, who it suits, size, materials, care.
- Variants and stock : Sizes, colours and SKUs set up correctly.
- Delivery and returns info : Visible without extra clicks.
- Alt text : A short description of each image.
Title example
| Weak | Stronger |
|---|---|
| Candle | Soy Wax Candle, Fig and Cedar, 220g, 45-Hour Burn |
The stronger title tells shoppers and search engines what the product is before anyone scrolls.
Where AI helps here
AI writing tools can draft product descriptions, titles and alt text for a catalogue of hundreds in an afternoon. Use them for first drafts. Then check every size, material and claim yourself. Rewrite anything that sounds generic so it matches your brand voice.
Avoid pasting in supplier descriptions. Other shops use the same text, which makes your pages hard to tell apart.
Once your products are live, your first set of eCommerce website features is in place: catalogue, product pages and categories. Payments and shipping come next.
Step 7: Set Up Payments, Shipping and VAT
This is the step that turns a catalogue into a shop. Get it right and checkout feels easy. Get it wrong and you’ll lose orders at the last click.
Payments
Offer the methods UK shoppers already use. The more of these your eCommerce website features include, the fewer people abandon at the payment screen:
- Debit and credit cards
- Apple Pay and Google Pay
- PayPal
- Buy now, pay later options such as Klarna or Clearpay
- Pay by bank, where your provider supports it
Every provider charges a percentage plus a fixed fee per transaction. As an illustration, a 2% +25p fee on a £40 order costs about £1.05. Rates vary by plan, so compare them before you commit. We break these down in the eCommerce website cost UK section.
Your provider should also handle strong customer authentication, the extra verification step so many UK card payments. Check it’s switched on.
Shipping
Decide these before you add a single rate:
- Carriers : Royal Mail, Evri, DPD or DHL, depending on parcel size and speed.
- Delivery options : Standard, next day, click and collect.
- Free delivery threshold : Set it just above your average order value. If customers spend £32 on average, free delivery over £40 nudges them to add one more item.
- Returns : Say who pays for return postage and show it clearly.
VAT
You must register for VAT once your taxable turnover passes £90,000 in any rolling 12 months, or when you expect to pass it within the next 30 days.
Sales on your own site and on marketplaces both count towards that figure. Below the threshold you can still register voluntarily, which lets you reclaim VAT on stock and equipment. Show consumer prices including VAT, and confirm the current rules on GOV.UK.
Step 8: Sort Your UK Legal Requirements
Legal pages feel like paperwork. They also protect you, and customers read them before they buy from a shop they don’t know.
| Requirement | What to put on your site | Why it applies |
|---|---|---|
| Privacy policy | What data you collect, why and how long you keep it | UK GDPR and the Data Protection Act 2018 |
| Cookie consent | A banner that asks permission before non-essential cookies such as advertising trackers | PECR |
| Business details | Trading name, address and contact email, plus company number and registered office if you’re a limited company | eCommerce and company law |
| Terms, delivery and returns | Price, delivery times and cancellation steps in plain English | Consumer Rights Act 2015 and Consumer Contracts Regulations 2013 |
| Clear pricing | Show the full price, including mandatory fees, from the start | DMCC Act, in force since 6 April 2025 |
| Genuine reviews | Publish only real customer reviews and disclose any incentives | DMCC Act |
Two points catch new sellers out.
The 14-day cooling-off period. For most online orders, customers can cancel within 14 days of receiving their goods. Personalised and perishable items are usually exempt, so say so in your returns policy.
Subscriptions. If you sell them, you need clear renewal terms, easy cancellation and cooling-off periods under the DMCC Act.
You will also need to register as a sole trader with HMRC or set up a limited company through Companies House before you trade. Most businesses that handle customer data must pay a small annual data protection fee to the ICO unless they’re exempt.
This is guidance and not legal advice. A short session with a solicitor or accountant before launch costs little compared with fixing a mistake after it.
Step 9: Test Everything Before Launch
A store that looks perfect can still fail at the basket. Test it the way a stranger would use it, on the devices they’d use.
Place a real test order. Put your payment in test mode, or buy one low-priced product with a real card and refund it afterwards. Then follow the order all the way through to the confirmation email.
Use this checklist and tick each line off:
Checkout and payments
- ☐ Every payment method completes an order.
- ☐ Delivery rates match what you set.
- ☐ Discount codes apply correctly.
- ☐ Guest checkout works without forcing an account.
Emails
- ☐ Order confirmation arrives within a minute.
- ☐ Dispatch notification includes a tracking link.
- ☐ Emails display properly on a phone.
Devices and browsers
- ☐ Chrome, safari, and edge
- ☐ An iPhone and an Android phone
- ☐ A slow mobile connection
Content and links
- ☐ No broken links or missing images
- ☐ Prices include VAT where they should
- ☐ Legal pages linked in the footer
Speed and accessibility
- ☐ Run your key pages through Google’s free PageSpeed Insights tool
- ☐ Alt text on every product image
- ☐ You can reach the basket using only a keyboard
Step 10: Launch and Promote Your Store
Before you go live, remove any password page and connect your analytics. Add your sitemap to Google Search Console. If you sell physical products, set up a Google Merchant Center account so your products can appear in free Google Shopping listings.
Then plan your first month. Quiet launches are fine as long as you have a routine:
Week 1: Soft Launch . Share the store with friends, existing customers and your email list. Offer something small, such as 10% off a first order for sign-ups. Collect feedback and fix what they find.
Week 2: Get found . Post product links on social channels, submit your pages to Search Console and email anyone who joined your list before launch.
Week 3: Read the data . Check where visitors leave. If many reach the basket but never pay, revisit your delivery costs and payment options. Ask your first buyers for honest reviews, and never write your own.
Week 4: Decide on paid ads . By now you know your best sellers and your real conversion rate. Start with a small budget on those products, and scale only if the numbers hold.
You know how to create an eCommerce website from the first idea to launch day. Next, we’ll look at design, because a few small budgets on those products, and scale only if the numbers hold.
eCommerce Website Design Basics That Help You Sell
Good design in a shop has one job. It helps people find a product, trust it and pay for it without effort. Use these eCommerce website design basics to get there.
Design for Mobile First
Many of your visitors will arrive on a phone, so build for the small screen first. Then check the desktop version.
- Buttons : Make them big enough to tap with a thumb.
- Text : Keep it readable without zooming.
- Menus : Use a simple menu icon, a search bar and a visible basket.
- Product images : Let people swipe through them.
Pick up your own phone and try to buy something from your store. If it feels slow or fiddly, your customers feel it too.
Keep Navigation Simple
People shop faster when they know where to look. Use clear names for your menu items. Plain words beat clever ones.
| Confusing | Clear |
|---|---|
| Our Treasures | Shop |
| Goodies | Gifts |
| Stuff for Home | Home and Living |
Add a search bar that people can see straight away. Add filters for size, colour and price too. A shopper who can narrow 200 products down to 12 is much closer to buying.
Build Product Pages That Answer Questions
A shopper can’t pick up your product, so your page has to do it for them. Put things in the order people look for them:
- Photos at the top : Show several angles and one photo of the product in use.
- Name and price : Clear and easy to spot.
- Add to basket button : Bright and easy to find without scrolling.
- Delivery and returns : A short line near the button, such as “Free delivery over £40. 30-day returns.
- Descriptions : Size, materials and care instructions.
- Reviews : Real ones from real customers.
If a question comes up again and again in your inbox, answer it on the page.
Make Checkout Quick and Easy
Many shoppers leave at checkout. Most of the reasons are fixable.
| Problem | Fix |
|---|---|
| Forced to create an account | Offer guest checkout |
| Long forms | Ask only for what you need |
| Surprise delivery costs | Show them in the basket |
| Few ways to pay | Add Apple Pay, PayPal and card options |
| Worry about safety | Show payment logos and a padlock |
| Unclear errors | Say exactly what went wrong and where |
Show the full price early. It builds trust, and UK consumer law expects it.
Keep the Look Clean and On Brand
Simple designs usually sell better than busy ones.
- White space : Leave room around images and text so pages feel easy to read.
- Fonts : Use two at most.
- Colours : Choose one main colour, and keep your buy button the same colour on every page.
- Photos : Use the same lighting and style across your whole range.
Make Your Site Fast and Easy for Everyone to Use
Quick speed wins
- Shrink images before you upload them.
- Remove apps you don’t use.
- Use a light theme.
- Test your pages with Google PageSpeed Insights.
Easy accessibility checks
- Write alt text for every product image.
- Use strong contrast between text and background.
- Make sure someone can use the site with a keyboard alone.
- Label form fields clearly.
Accessible sites are easier for everyone to use. The UK Equality Act also expects businesses to make reasonable adjustments.
Design Differently for B2B and B2C
The best design depends on who you sell to.
| B2C Shoppers | B2B Buyers | |
|---|---|---|
| Main goal | Find something they like quickly | Reorder the same items fast |
| Pricing | Same price for everyone | Trade prices after login |
| Key features | Wishlists, reviews, fast checkout | Account pages, bulk ordering, invoices |
| Example | A candle shop with gift bundles | A packaging supplier with reorder buttons |
If you sell to both, show a clear “Trade accounts” link in the header.
Essential eCommerce Website Features
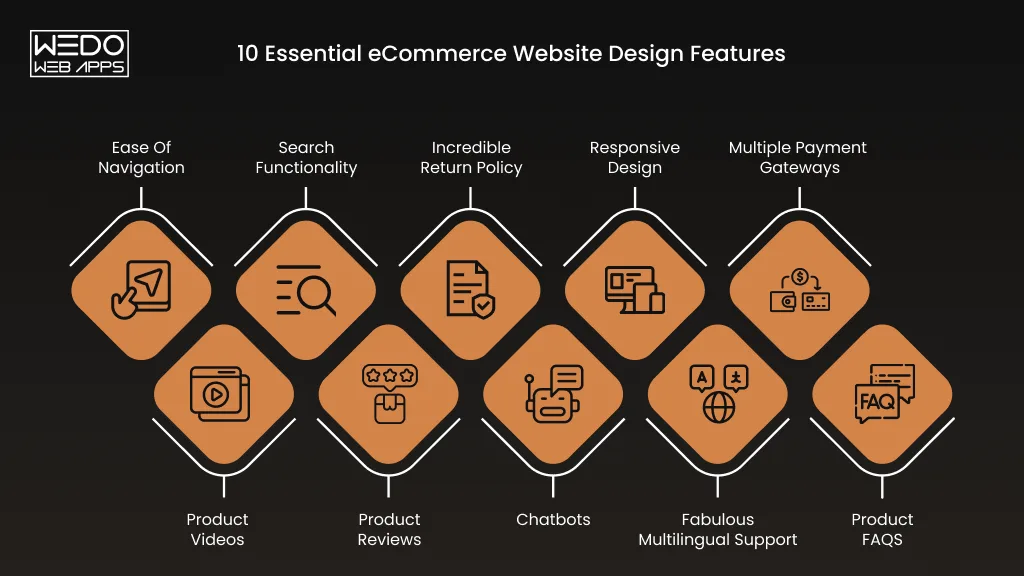
The right eCommerce website features make shopping easy for your customers and running the store easy for you. Some matter from day one. Others can wait until you have regular sales.
If you are creating an eCommerce website on a small budget, start with the must-have below:
Must-Have Features at Launch
Help customers find products
- A visible search bar
- Filters for size, colour and price
- Clear category pages
- Product pages with several photos and a stock status
Help customers buy
- A basket that saves their items
- Guest checkout
- An order confirmation email
- Order tracking
- Optional customer accounts
Help customers trust you
- A padlock in the browser bar (SSL)
- Customer reviews
- Contact details and a quick way to ask a question
- Delivery and returns info that’s easy to find
Help you run the store
- A simple dashboard for products and orders
- Stock tracking
- Analytics, such as Google Analytics
- An email sign-up form
If any item on this list is missing, add it before you launch.
Security Features That Protect You and Your Customers
Most platforms handle security for you. A quick check still pays off:
- Payment provider : Use one that stores card details so you don’t have to. Look for PCI DSS compliance.
- Extra card checks : Make sure your provider supports 3D Secure, the step where a bank confirms the buyer.
- Fraud screening : Switch on any built-in checks for suspicious orders.
- Admin logins : Use strong passwords and two-step login for everyone on your team.
- Updates : On WooCommerce, update plugins and themes regularly.
Growth Features to Add Later
You don’t need everything at once. Add each feature when a real need shows up:
| When you notice | Add this |
|---|---|
| Customers ask if an item is back in stock | Back-in-stock alerts |
| Shoppers fill baskets but don’t pay | Abandoned basket emails |
| The same people keep buying | Loyalty points or subscriptions |
| Orders arrive from overseas | Multiple currencies and international shipping rates |
| You also sell in a physical shop | Click and collect and shared stock |
| Admin work eats your evenings | Links to accounting and email tools |
AI Features Worth Considering
Many problems now include AI tools. Three of them help shoppers directly.
- Smarter search : It understands typos and everyday phrases. A shopper can type “black dress for a wedding” and still see relevant products.
- Product recommendations : A shopper looking at a tent sees sleeping bags and camping stoves. That can raise the value of each other.
- A chat assistant : It answers common questions about delivery, returns and order status at any hour.
Pick one to try first. The chat assistant is often the easiest, because your FAQ page already holds the answers.
Two things to watch. Always give customers a way to reach a real person, especially for refunds or allergy questions. And if the assistant collects personal details, mention it in your privacy policy.
eCommerce Website Cost UK: What Should You Budget?
| Route | Typical cost | Time to build | Best for |
|---|---|---|---|
| DIY on a hosted platform | About £20 to £30 a month, plus domain, theme and apps | Days to a few weeks | Small catalogues and standard checkout |
| Freelancer | Roughly £2,000 to £10,000 | A few weeks to 2 months | Custom look on Shopify or WooCommerce |
| Agency | Roughly £5,000 to £30,000 | 8 to 16 weeks | Larger catalogues, integrations, bespoke design |
| Custom or headless build | £15,000 to £40,000+ and more for complex platforms | Several months | Complex pricing or unusual workflows |
Quotes vary a lot between suppliers. Treat these as ranges to plan with, not fixed prices.
Most platforms and developer prices are listed without VAT. Add 20% unless the quote says otherwise.
What A Small Store Costs in Year One
Say you’re creating an eCommerce website on Shopify with 50 products. You expect about £2,000 in sales a month, with an average order of £40.
- Platform : £228 a year on an annual Shopify Basic plan.
- Domain : roughly £10 to £20.
- Theme : £0 to £300.
- Apps : £0 to £600.
- Product photos : £0 if you shoot them yourself, up to £500 for a photographer.
- Payment fees : about £480, based on 1.5% +20p per card payment across 600 orders.
Total : roughly £700 to £2,100 before VAT.
Those figures are my own illustrations. Your costs will shift with your sales and the apps you choose.
Costs People Forget And How to Avoid Them
- Payment fees grow with sales. Build them into your product margins from day one.
- App subscriptions pile up. Review them monthly and keep only the ones that earn their place.
- Domains renew at a higher price. Check the renewal rate before you buy.
- Theme and plugin licences expire. Note renewal rate before you buy.
- Fixes after launch cost extra. Ask your freelancer or agency for a support plan or hourly rate in the quote.
- Marketing sits outside the build price. Set aside a separate budget for ads, email and content.
For customer and WooCommerce builds, some UK agencies suggest setting aside 30 to 50% of the build cost each year for hosting, updates and support.
DIY, Freelancer or Agency?
Choose DIY if you sell under 100 products, you’re comfortable learning new tools and you want to start small.
Choose a freelancer if you want a custom look but don’t need complex integrations. Check their past shops before you hire.
Choose an agency if you have a large catalogue, need stock systems linked up or want a team that handles design, build and testing.
Whatever you pick, ask for a written quote that shows what’s included. Ask for the 12-month total too, not only the build price.
How AI Is Changing eCommerce Website Creation
AI tools now touch almost every stage of creating an eCommerce website. Some save you hours. Others decide whether shoppers ever see your products.
Use AI to Build and Run Your Store Faster
These jobs eat up time in the first few weeks. AI can handle the first draft of each.
- Product copy : Paste in a product’s size, material and care details and ask for a short description. Example: “Write a 60-word description for a soy candle, 220g, 45-hour burn, fig and cedar scent.
- Alt text and titles : Generate alt text for 200 product photos in one go.
- Image clean-up : Remove backgrounds and resize photos to a standard size.
- Policy drafts : Get a starting point for delivery and return pages, then have a professional check them.
- Customer emails : Draft replies to common questions, such as “Where is my order?”
Always edit what comes back. Check every measurement, material and claim yourself.
Use AI to Learn What Your Customers Want
Your shop produces a lot of text. Reviews, support emails and search terms all show what shoppers think.
- Review summaries : Ask AI to group your reviews by theme. If 15 people say a jumper runs small, update the size guide.
- Search term reports : Look at what shoppers type into your search bar. Repeated searches for a product you don’t stock show you where to expand.
- Stock forecasts : Some platforms predict which items will sell out. This helps you reorder before it happens.
Get Your Products Found in AI Shopping Tools
Many shoppers now ask ChatGPT, Gemini or Copilot questions like “best waterproof jacket under £100”. These tools suggest products and, in some cases, let people buy inside the chat.
They read your product data to decide what to show. Clear data helps. Gaps hurt.
Checklist for AI-ready Product Pages
- Full product titles with brand, size and colour.
- Barcodes (GTIN) where you have them.
- Accurate price and stock status.
- High-quality images for every variant.
- Clear delivery and returns details.
- Real customer reviews.
- Product schema markup, the code that labels price, stock and reviews for search tools.
- A Google Merchant Center feed.
Shopify can already share eligible products with AI channels such as ChatGPT, Google AI Mode and Microsoft Copilot through its Agentic Storefronts feature. Some of these features began in the US, so check what’s available to UK stores on your platform.
Where to be Careful
| Risk | What to do |
|---|---|
| AI invents a detail, such as a material or size | Check every product claim against your supplier sheet |
| All your copy sounds the same | Edit the draft in your own voice |
| Customer details go into a public AI tool | Never paste names, addresses or order data into one |
| AI-written reviews appear on your site | Don't publish them. Fake reviews are banned under the DMCC Act |
| A chatbot gives a wrong answer about refunds | Keep an easy route to a real person |
Start small. Pick one task from this section and test it for a week. Keep it if it saves time without lowering quality.
Conclusion
You now know how to create an ecommerce website from the first decision to the first month after launch. Choose your model and platform, set up payments and legal pages, test the checkout, then keep improving with real data.
Start with the next small task. Pick your platform, write your first five product pages or place a test order. Each one moves you closer to your first sale.
If you’d like help with any part of the build, from platform choice to launch, tell WEDOWEBAPPS about your offer.